Have you ever noticed how the biggest difference is going from zero to initial success?
I mean, when you make your first $100 on eBay, it’s much more exciting than going from $100 to $200.
It’s the same when you learn to play the first guitar song, when you learn how to ride the first few meters on your bicycle etc…
The initial boost from zero to something almost always seems to be profound!
I’m constantly amazed at how a few basic design tips can make an “ughhh” eBay listing into a “wow!” one.
Unfortunately, my own design skills are, ahmm… limited 🙂 So I’m at no position to give professional advice on the design aspect of eBay listings.
This is why, for this new series of posts, I’ve joined with my friend Etienne Amion, who is a professional designer and a veteran eBay seller.
In these posts, we will share quick & easy design tips that will help you make a big leap forward with your eBay listings.
Our first post is dedicated to the main image, or the “Gallery image” as referred to by eBay. According to eBay – “Listings with better photo quality are 5% more likely to sell”.
You will learn:
- How to take good pictures for eBay
- How to add pictures to eBay listing
- eBay picture rules
- Best eBay photo tips
This is me (Professional graphic designer)
Hi, I’m Etienne. As a professional graphic designer and active eBay seller for the past 7 years, I have truly seen it all, the good, the bad and the ugly of eBay listings. I will share with you the best practices from the powersellers along with a few secrets of my own. The relationship between good design and eBay sales success is clear (like this 220% uplift in sales case study).
Taking the time to focus on the best practices and consistently following simple rules is the key to success.
Together we’ll break down what may seem complicated at first into actionable hints and tips to give your eBay listings the best chance at success.
Overview – how to take good pictures
A successful eBay listing is made up of many moving parts. As you join me in this blog series we will touch on them all. There are simple rules you can follow to gain an edge over your competition. You don’t have to get them all right from the outset, Take them step by step and before you know it you’ll be performing like the pros.
It all starts with your images, the first thing your prospective buyers see, the first opportunity to make a great impression.
An eye catching gallery image is the first step toward attracting prospective buyers to your listing so let’s get to it!
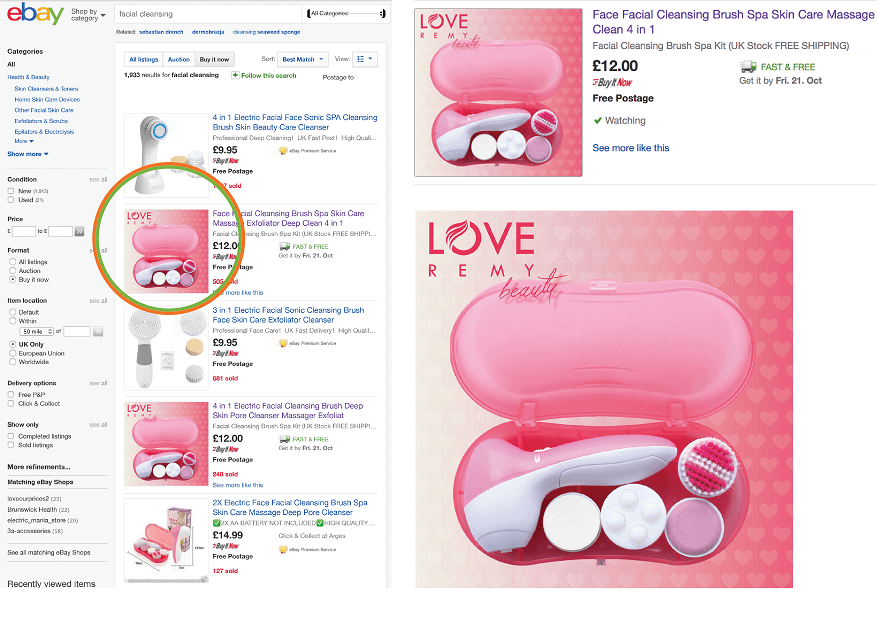
how to take good pictures – main image gallery on eBay
Well lit, carefully framed, high resolution images will give you the edge and give buyers a reason to click through to your listing.
As eBay sellers we spend the majority of our time trying to stand out from the crowd. Take a moment and put yourself in your buyer’s shoes. You type in your search term and have 100’s, in some case 1000’s of listings returned, how do you decide your next move, or more importantly your next click! A great, eye-catching image of course. Believe it or not, price is not always the deciding factor, never aim to be the cheapest out there, aim to be the best for your segment of customers.
It still surprises me to see 9 /10 images on the first page of results looking like carbon copies. Don’t get me wrong, I will browse a couple of the top adverts, but more often than not, something different catches my eye:
- Sometimes it’s the angle of the shot
- Maybe a focus on a key product feature
- Or simply the fact that the quality of the image is clearly better than the rest.
These are the types of listings that earn a click through from me. Wow buyers with your main image and you’ll be a step closer to securing that important sale.
They say “A picture is worth a thousand words”- As far as eBay is concerned, great images could be worth thousands of dollars! Let’s get to it!
Victor’s comment:
The ratio of Traffic-to-clicks to your listings are the lifeline of your eBay business.
A great gallery image helps improve your “Click through rate” – For each listing, the number of clicks your listing got from within eBay divided by the number of impressions. For example, if your listing gets 1,000 impressions and 5 clicks, your click-through rate is 0.5%
This can easily be seen from eBay’s new seller hub –
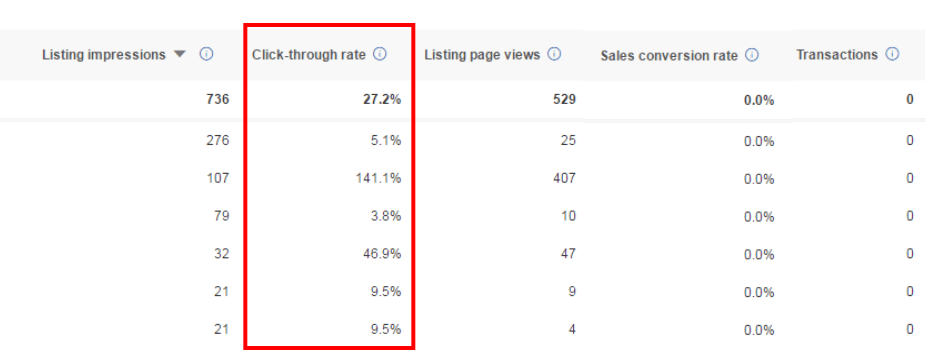
ebay seller hub click through rate
This time, we’ll be focusing on the basics, how to take good pictures that increase your eBay sales. Here are some of the things to look forward to in this post:
- Part 1 : Shoot to sell.
- Part 2 : Simple Edits that make all the difference.
Try CrazyLister for free! Easily create professional, mobile-optimized eBay listings
Part 1 : How to take good pictures that sell more
Lighting
Natural light is your best friend. If you have the opportunity to shoot in good natural lighting, take it. A great place to set up for your shoot is near a window or near a white wall if it reflects the light well.
Shooting on location or outdoors can also be great depending on the product.
Just be conscious of the time of day to avoid harsh, mid-day sunshine (early morning or late afternoon light is best). Be sure to complete your photo reel at the same time of day, and preferably on the same day to keep lighting consistent.
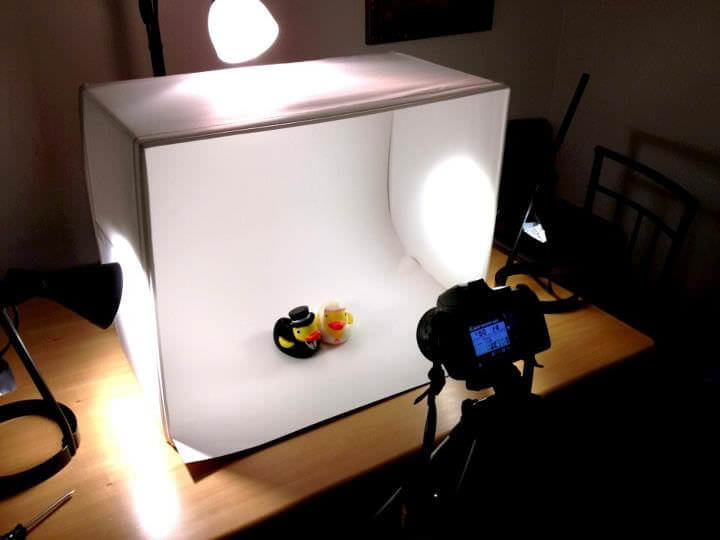
how to take good pictures using lighting box
A lighting box is great for consistency. You’ll be amazed at how playing with lighting can improve your photos.
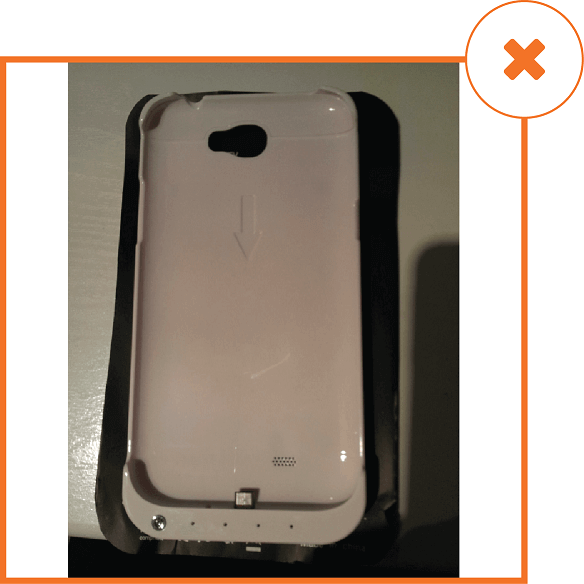
ebay pictures – bad lighting sample
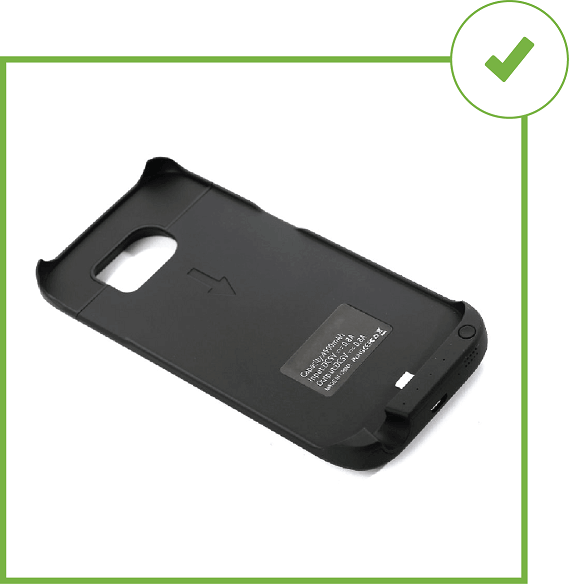
ebay pictures – good lighting sample
Background
It is best practice keeping your background as clean and simple as possible. If you do not have the chance to use a lighting box, don’t panic, you can pick up some nice white paper from your local art shop. Even a well ironed tablecloth will do the job (be sure not to use anything with a deep grain or texture to it as this can come through in your photos).
Let’s not rule out the more interesting backdrops. These work best with smaller items, such as jewellery. Wood, patterned paper and metal surfaces can all add that something special to your images where appropriate. Be sure to frame the shot nicely. Your product is the focus, so view your images impartially, ask a friend what they see and, of course, watch out for any heavy shadows.
Similar framing rules apply to larger items. Frame your shots carefully. Ensure that your shot is clear of clutter by setting up next to a blank wall that will double as your backdrop.
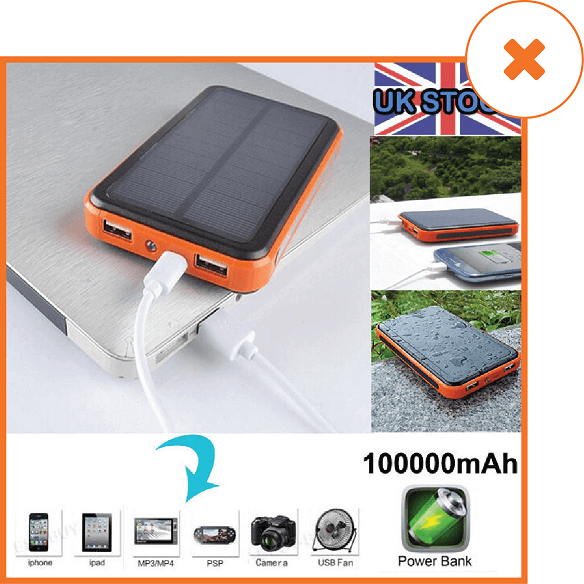
ebay pictures – bad background
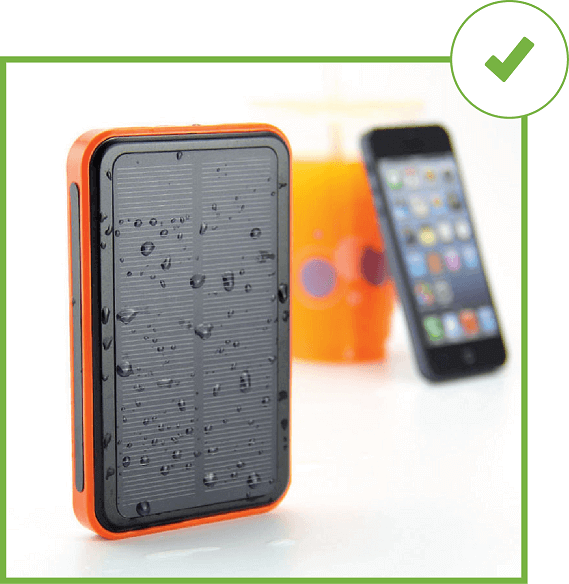
ebay pictures – good background
How to shoot
Tripods are fantastic, they can turn your smartphone into a great camera. Especially when taking photos of small objects, a little camera shake can end up blurring the finer details.
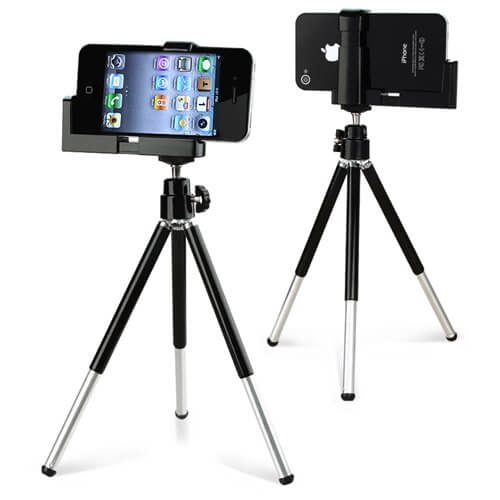
smartphone tripods to help taking good pictures
Get up close and personal with those smaller items. If you’re using a camera, make sure that you set the lens to macro. Most smartphones auto focus when up close and will deliver better images in some cases than some of the best digital cameras.
Finally, shoot in as high resolution as you can to get the best shot possible. You can always crop and resize the image later if needed.
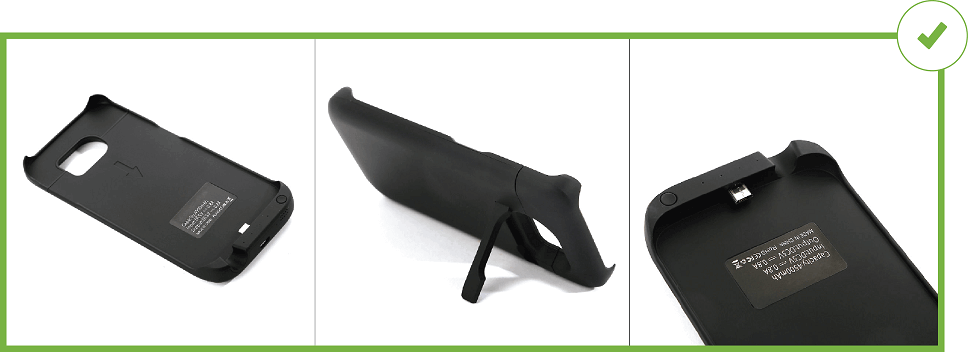
how to take good pictures – example
What to shoot
Get creative with those angles, shoot your product from its good side. Be sure to cover all the important details and features to communicate to your buyer exactly what they are buying, no surprises! Looking at professional product photography for inspiration can be very helpful and always, always shoot way more than you think you need to get the perfect shot from every angle. As you gain experience, you’ll figure out what works best for different products.
If you are photographing fashion or jewelry products, get a picture with someone wearing it. Pull in a favor from a good-looking friend and have them model for you. If that’s not possible, put a familiar object in the shot for size comparison, ensuring that the focus stays on your product and not the props you use.
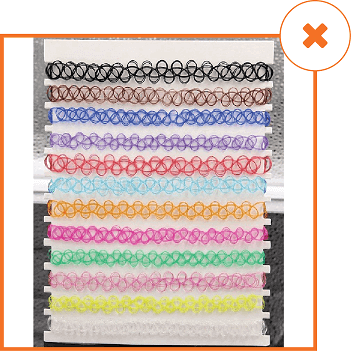
bad shooting sample
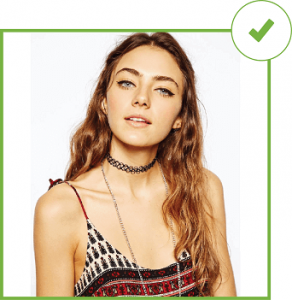
good shooting sample
Part 2 : Simple Edits “The devil is in the details”
I couldn’t talk about images without leaving you with a couple of pro tips. You’ll be surprised at how some simple edits can really transfer your images.
I would describe the examples below as intermediate as the images were edited in just a few minutes using Adobe Photoshop.
After following the guidelines, you’ll have some great shots, but when you’re ready and have the software you need, get onto YouTube and learn to edit like a pro.
Adjusting White Balance
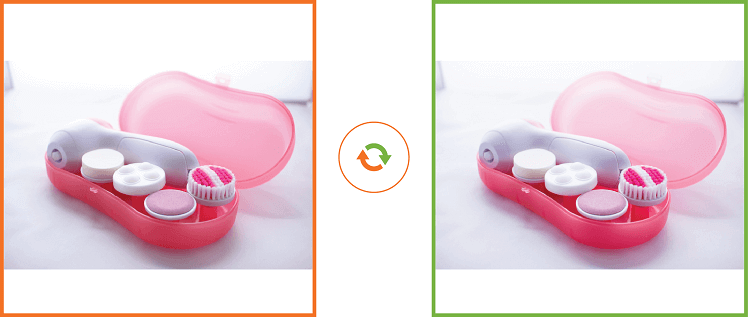
how to take good pictures Adjusting White Balance
Removing Background
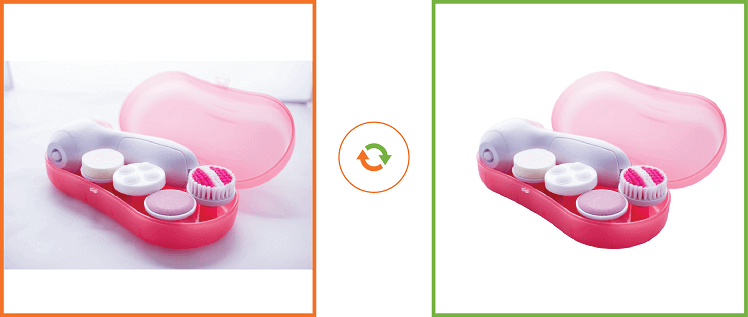
how to take good pictures Removing Background
Adding Soft Shadows
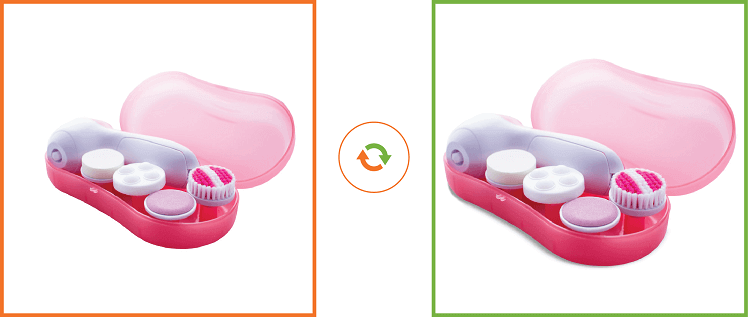
how to take good pictures Adding Soft Shadows
Key Takeaway – taking good pictures to increase eBay sales
The quality of your image gallery will have a direct impact on the success of your eBay listing. Do not worry about getting everything right all at once, practice makes perfect.
Apply the hints and tips contained in this post to make your images really stand out from the crowd to earn your listings the attention they deserve.
Bonus: How to Use CrazyLister for Free!
We’ve got some exciting news for CrazyLister users: starting today, you can take advantage of our new referral program and earn credit to use CrazyLister for FREE, again and again… and AGAIN
Here’s how to take advantage of this special offer (it’s super easy):
- From your CrazyLister account, go to “Earn $$“
- Insert your friends’ emails and click on “Invite Friends”
- Once your friend starts using CrazyLister, you stop paying!
The more friends you invite, the more cash you get. Cha-ching!


